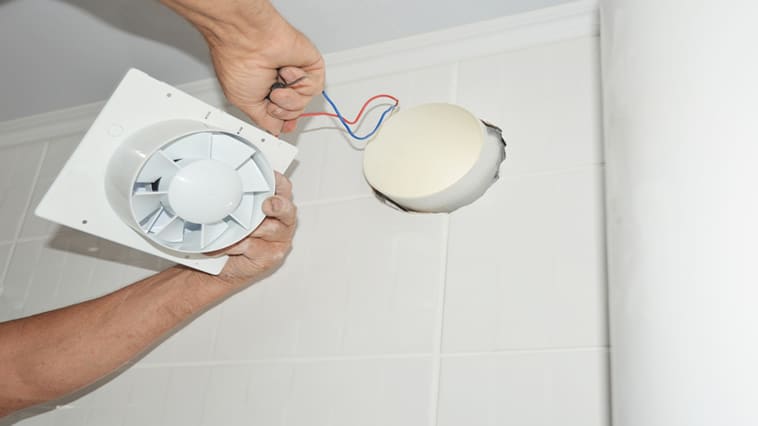
So how to install a bathroom fan where one does not exist? If you are looking for an answer, you have come to the right place.
As you already know the bathroom is the most humid and moist place in your house. Persisting moisture in the bathroom can lead to bad odors and damp air. This is not only creates an uncomfortable environment in your bathroom but also damages the bathroom walls, doors, paint, cabinets, and even curtains.
Increased moisture levels can also lead to the growth of mold and mildew, which poses a potential risk to your health. This is why installing a bathroom fan with a humidity sensor is crucial.
If you want to do it yourself, I can help you get the steps right. In this brief guide, I have included the steps to install a bathroom fan. If you want to improve the existing environment of your bathroom, then you should give this article a read.
Things To Consider Before Installation
Before you start installing a bathroom fan, you need to determine a few things. I have explained all the important factors in the pointers below.
Selecting the proper fan size for the bathroom (CFM rating)
Bathroom fans are rated by CFM or cubic feet per minute. For those who don’t know CFM is used to measure the amount of air moved by the fan per minute. In simple words, it means airflow. The bigger the fan size, the higher the CFM rating.
The minimum CFM is 50, which is suitable for smaller bathrooms. For larger bathrooms, it is usually 100 CFM or more.
When it comes to how to install a bathroom fan where one does not exist, choosing the right CFM is very important.
Consider the sound level of the fan
Having a loud or noisy fan is annoying. Sound ratings on modern bathroom fans range between 0.5 and 6 sones.
You are required to choose the rating that will best suit your needs. The sound rating usually comes printed on the box.
Determine the location of your bathroom fan
The placement of the bathroom fan matters because it can impact ventilation. The best place to install your fan is at the center point between your toilet and shower. Other ideal spots could be close to the shower base or bathtub.
When installing a new bathroom fan make sure to have enough space in your attic. That’s because the bulk of the fan will be located there. It should be installed between two joists.
Find out your electrical options
The best option is to use an existing switch for your new fan. If you are installing a fan with lights, you will need an additional switch.
However, if your old fan doesn’t have a light, you will have to get new wiring done to install a double switch.
Tools & materials needed
To get you started with the installation process, you need all the right tools. The list of items you will need are:
- Pencil
- Jigsaw
- Power Drill
- Screwdriver
- Stepladder
- Combination Pliers
- Screws and silicone Caulk
- Vent Cap
- Flexible duct pipe
- Wire Nuts
- Mask to block dust from drilling
- Cordless drill
- Roofing nails, safety harness, cement & shingles, roof brackets
- Safety glasses
Installation

Now that you know the things to consider or prepare before installation, let’s move on to the steps. This section is for people who want to install a bathroom fan on their own.
So how to install a bathroom fan where one does not exist? Let’s find that out.
Before installing a new exhaust fan, you need to make sure that your bathroom can handle the appliance. This is important for the safe installation of the exhaust fan.
Here are the installation steps you need to follow:
Cut a hole for the fan
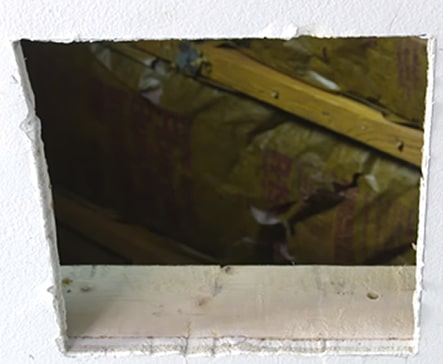
The first step is to cut a hole based on the size of the bathroom fan you want to install. Mark the location of your fan using a 16-inch roofing nail into the drywall at each corner.
Now locate the nails from the attic and mark the location of the bathroom fan with a pencil. Cut out the drywall using a saw and start drilling a hole.
In case, the roof is inaccessible or there’s no attic, use a stud sensor to locate a joist from the bathroom and then cut it open from below.
Attach the fan to the joist
Now you need to attach the fan to the joist with screws. Leave a 6-inch gap between the insulation and the fan.
Cut board pieces of 2 ft x 4 ft to fit between the joists. Attach wood pieces with screws.
Make a hole in the roof
To cut a hole in the roof, mark a circle on the underside of the roof. Now start drilling a hole and then cut the circle out with a saw.
You also need to remove the shingles from and around the hole. Make sure to be careful, to not damage anything.
Install the roof vent
In the next step, you need to install the roof vent. Slide the top flange under the shingles and then use roofing adhesive to seal the flanges.
Use roofing nails to secure the vent flanges. You need to do this before installing the shingles.
Once done, you can install the shingles and apply roofing cement to seal the joint with the shingles.
Connect the wire to the bathroom fan
So how to wire a bathroom fan where one does not exist? Use slide clamps over the duct at both the fan housing and roof cap. Slip the clamps over the tailpieces of the fan and roof vent and tighten them. Also, wrap the joints using duct tape.
Turn off power the power before wiring. Run the cable to the switch and the fan. If you are installing a bathroom fan with a light, you will need a three-wire cable. Follow the instructions given by the manufacturer to wire the fan properly. After that plug the fan motor into the built-in receptacle.
Wire the switch
For a fan and light switch, splice the white wires and connect the grounds with wire connectors.
Connect power to both switches using two pigtails spliced to the feed wire.
Connect the black wire to one switch terminal and the red wire to the other terminal.
Cost to install a bathroom fan where one does not exist
So many of you want to know the cost to install a bathroom fan where one does not exist. I will break down the total expenses in this section. This will give you an idea of the amount you will have to spend.
Bathroom fans are available in different styles and types. However, the size and installation method vary by the bathroom.
This is why there is a wide range of costs included with this project. The national average cost range to install a bathroom range between $250 and $500. Most homeowners are found to spend around $350 to install a new bathroom fan.
Whereas, a premium bathroom fan with new ducts running through hard-to-reach areas may cost an average of $800.
Here are the details of the total costs based on materials only:
- Ceiling-mounted: $16-$200
- No-cut: $150-$150
- Wall-mounted: $16-$250
- Room access: $50-$150
- Exterior: $50-$300
- Fan with a light: $50-$175
- Fan with a heater: $75-$240
- Inline: $50-$300
- Fan with Bluetooth: $90-$300
- Fan with light and heater: $75-$275
From this table, you can get an idea of the total costs to install a new bathroom fan.
Q&A
What do you do if your bathroom doesn’t have a fan?
If you don’t have a bathroom fan, you should keep the doors and windows open. You can also use a dehumidifier to maintain moisture levels.
Is it illegal to not have a fan in a bathroom?
Bathroom fans are not required by all building codes. That’s because all municipalities have different requirements.
Where is the best place to vent a bathroom fan?
A bathroom fan must vent directly to the exterior of the home. It is better not to put the vent termination in a roof overhang or soffit.
Can I use a flexible duct for the bathroom fan?
Yes, you can use an insulated flex duct in longer vent run applications to help to keep the humidity from condensing inside the duct. This also prevents the pooling of water, which can damage the core.
Conclusion
Now that you know how to install a bathroom fan where one does not exist, it should be easier for you to get it done. By installing a bathroom fan, you can keep the moisture levels to normal and prevent the growth of mold and build-up of warm and humid air.
